

rustic gluten-free salted caramel apple tart
/
RUSTIC GLUTEN-FREE SALTED CARAMEL APPLE TART
Apple season seems to go on and on around here. I'm definitely not complaining. I've got recipes galore that I like to make every Fall.... Skillet Apple Crisp, Apple-Pear Sauce, Apple Crisp Ice Cream, and now this recipe for a Salted Caramel Apple Tart.
I haven't baked anything that called for puff pastry since my son was diagnosed with Celiac Disease over 7 years ago. A friend recently recommended GeeFree Gluten-Free Puff Pastry and I happened to be near a Whole Foods the other day, so I picked up a box. With one "sheet," I made Pigs in a Blanket... because PIGS IN A BLANKET, duh. The other sheet sat around in my freezer for awhile until a few weeks ago when I needed a quick gluten-free dessert. After a brief search of apple desserts, I came across one that seemed perfect. Perfect because it didn't use too, too many ingredients. And, perfect because it was on SmittenKitchen. I swear, I've never had a SmittenKitchen recipe go wrong. They're all winners. How does she do that?!?
Anyways, of course, it wasn't naturally a gluten-free recipe, but thanks to the puff pastry sheet chilling out in my fridge, it was easily adaptable. Hooray! This recipe does require a dry burn method for making caramel. Thanks to Jeni Britton Bauer and the Salted Caramel Torrone Ice Cream I made earlier this year, this step didn't phase me a bit. And, it shouldn't phase you. Be brave. Making your own caramel is The. Coolest. Thing. Ever.
And, while you're at it, don't freak out about using a mandoline either, It's what makes this dessert almost too pretty to eat. But, eat it. Food is meant to be enjoyed.
Rustic Gluten-Free Salted Caramel Apple Tart
- 3-4 large crisp apples
- 1/4 cup plus 2 TBSPs granulated sugar, divided
- 4 TBSPs unsalted cold butter, divided
- 1 package of puff pastry (I recommend geefree for a GF puff pastry)
- 1/4 tsp (plus more for sprinkling) flaky sea salt
- 2 TBSPs heavy cream
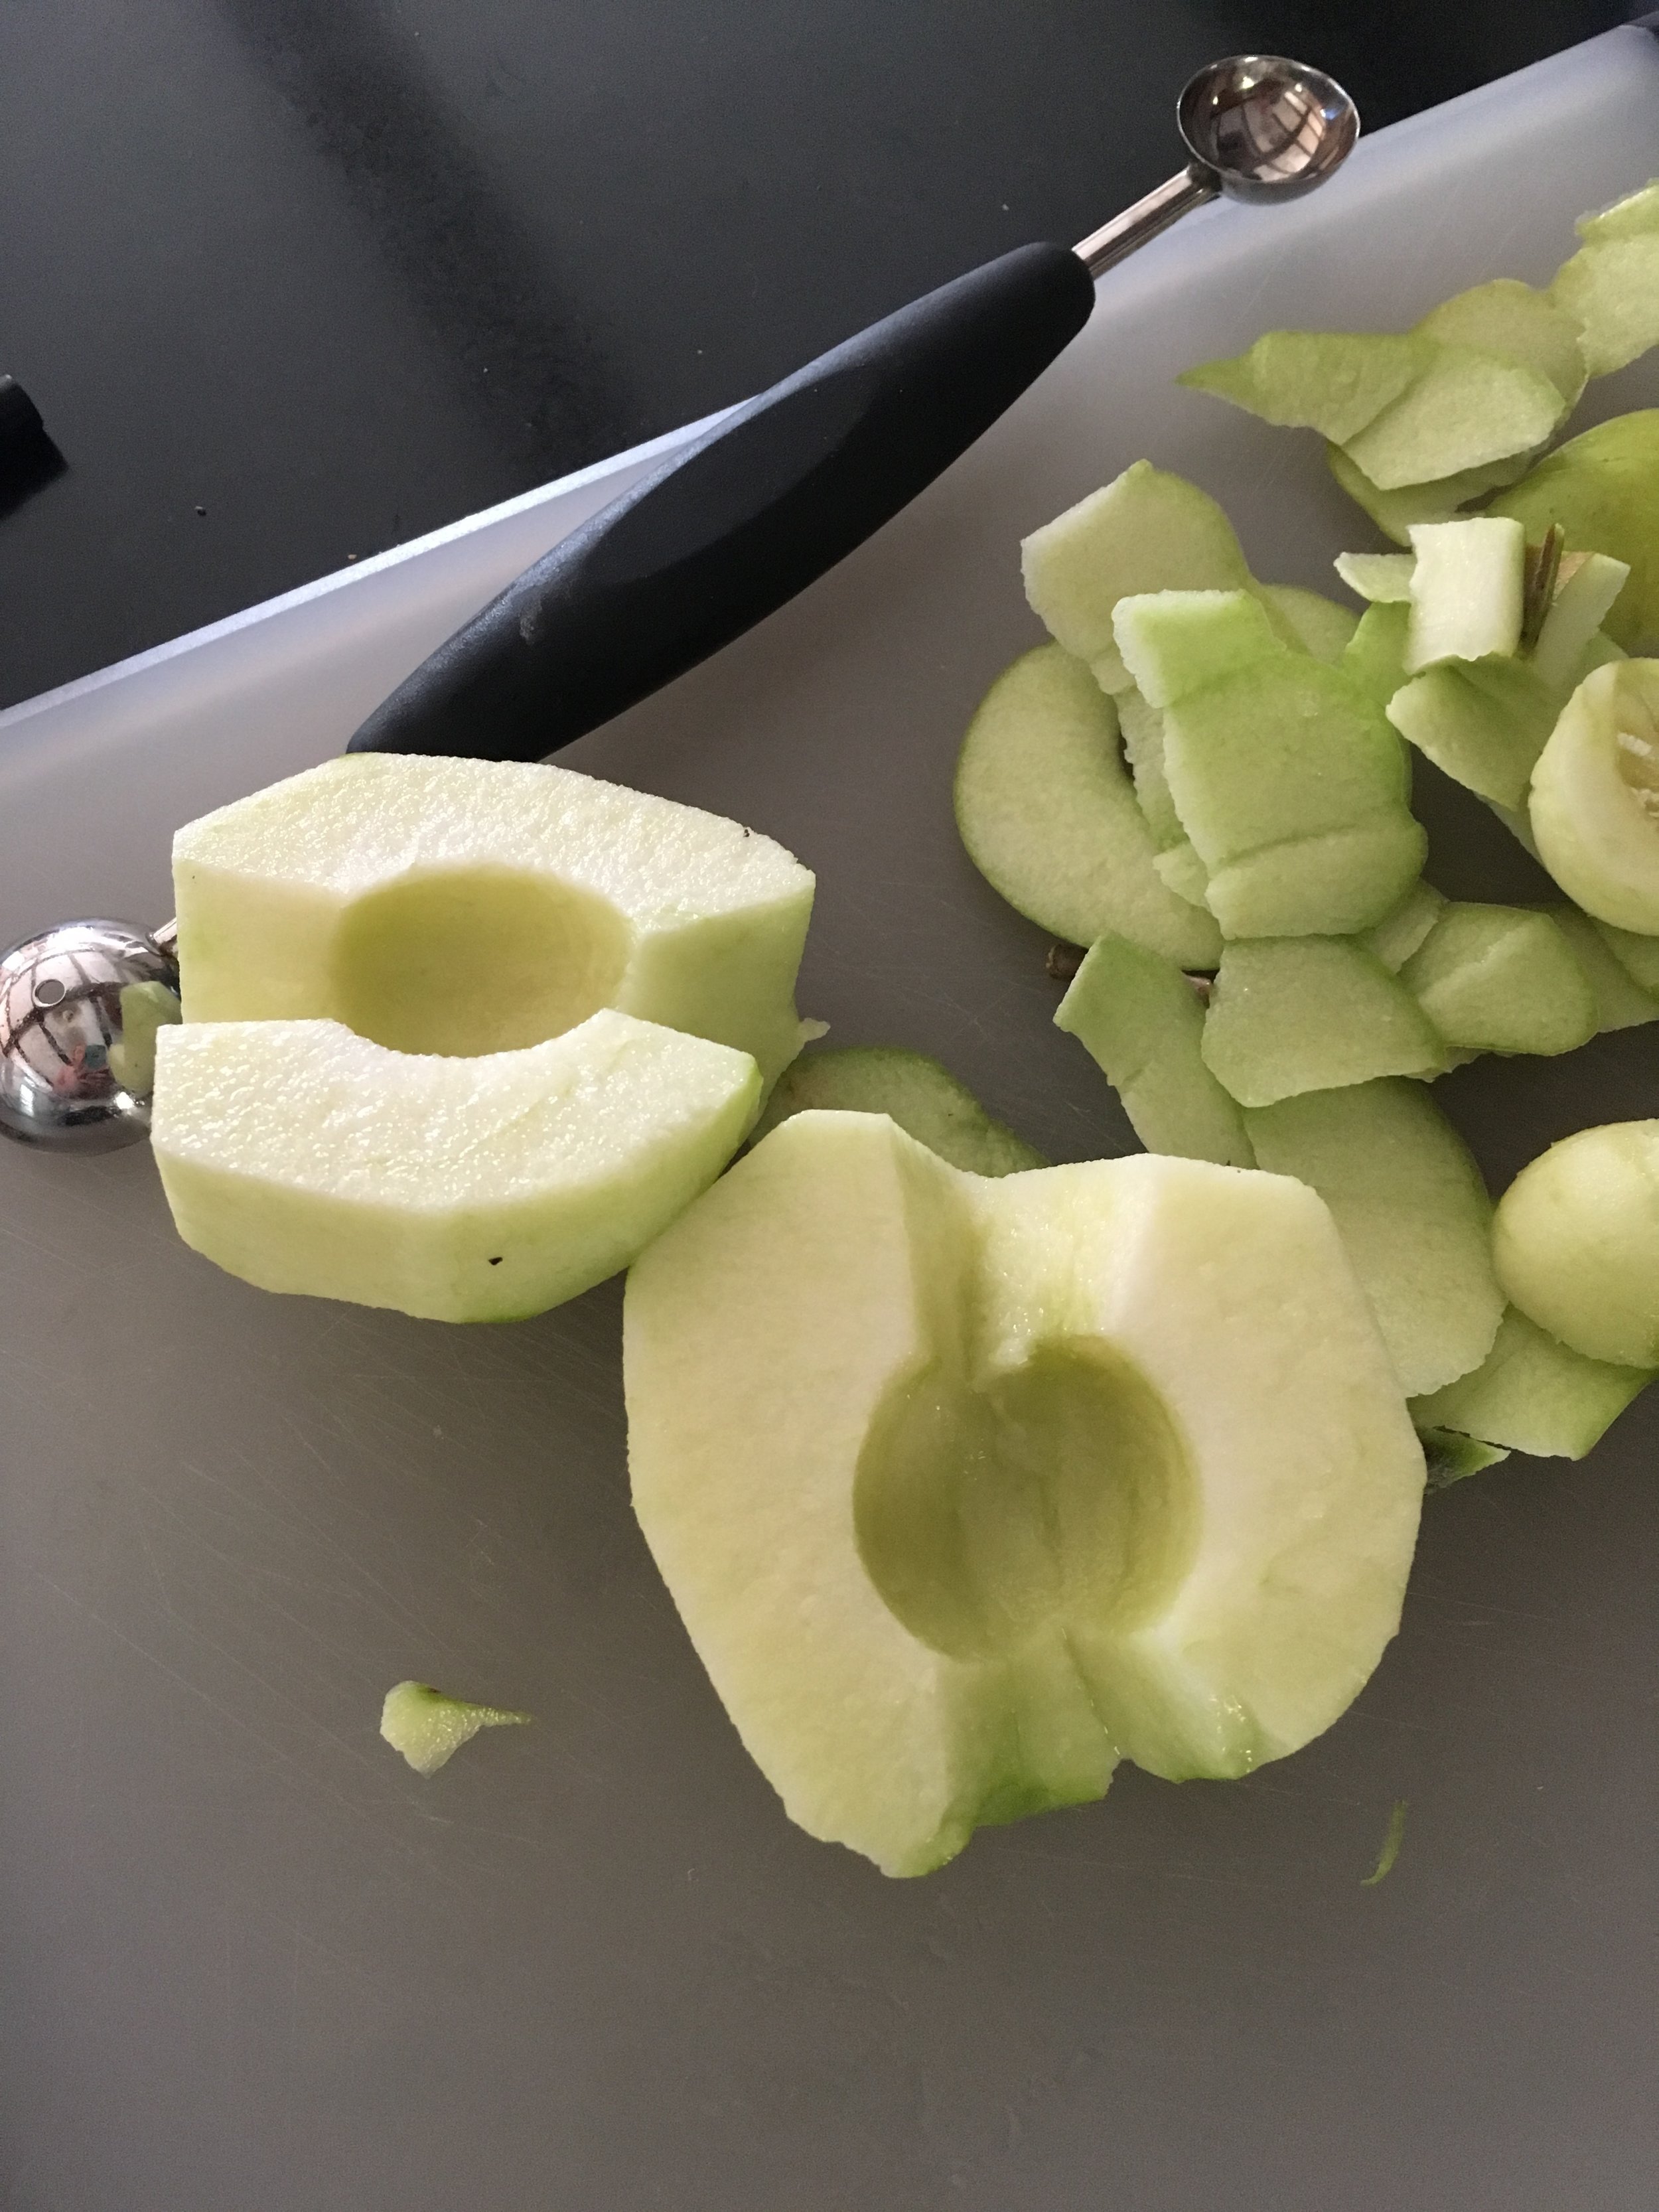
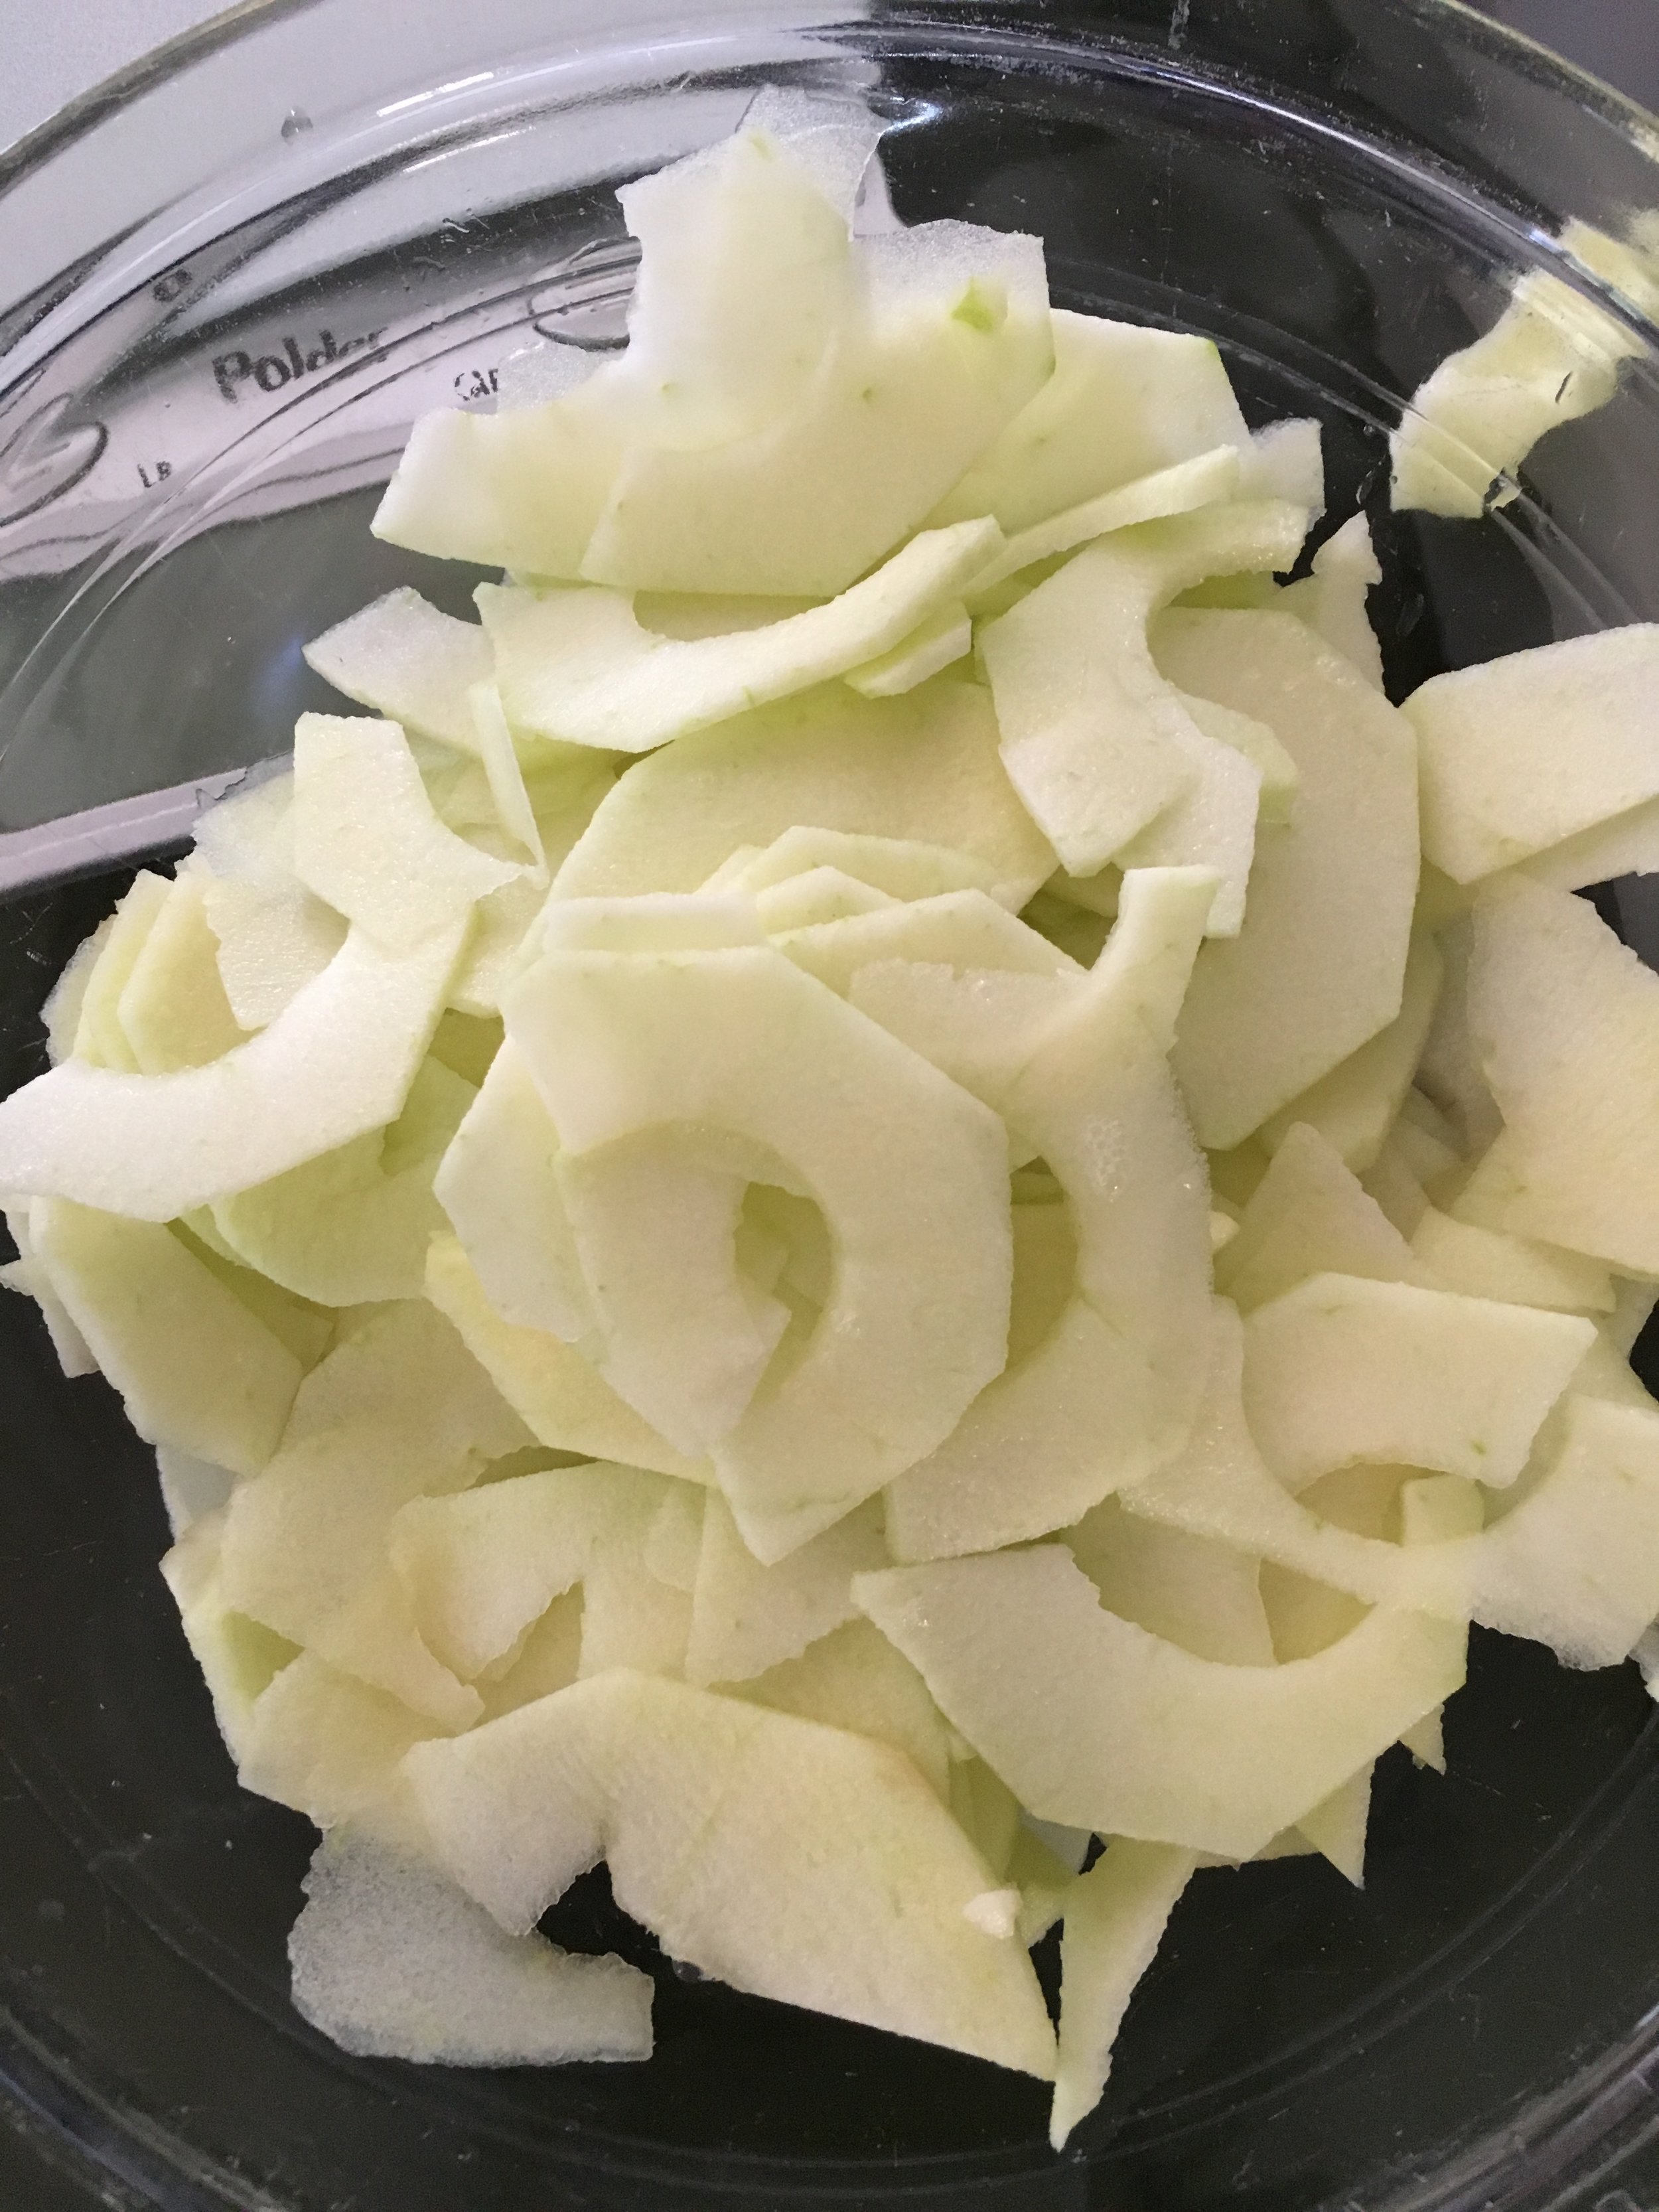
Preheat oven to 400 degrees F and line a baking sheet with parchment paper. Peel and slice each apple top-to-bottom down the middle. Using a melon baller, scoop the core out of all apple halves. Run each apple half across your mandoline set to the thinnest setting, or approx. 1/16th of an inch. Set thin apple slices aside.
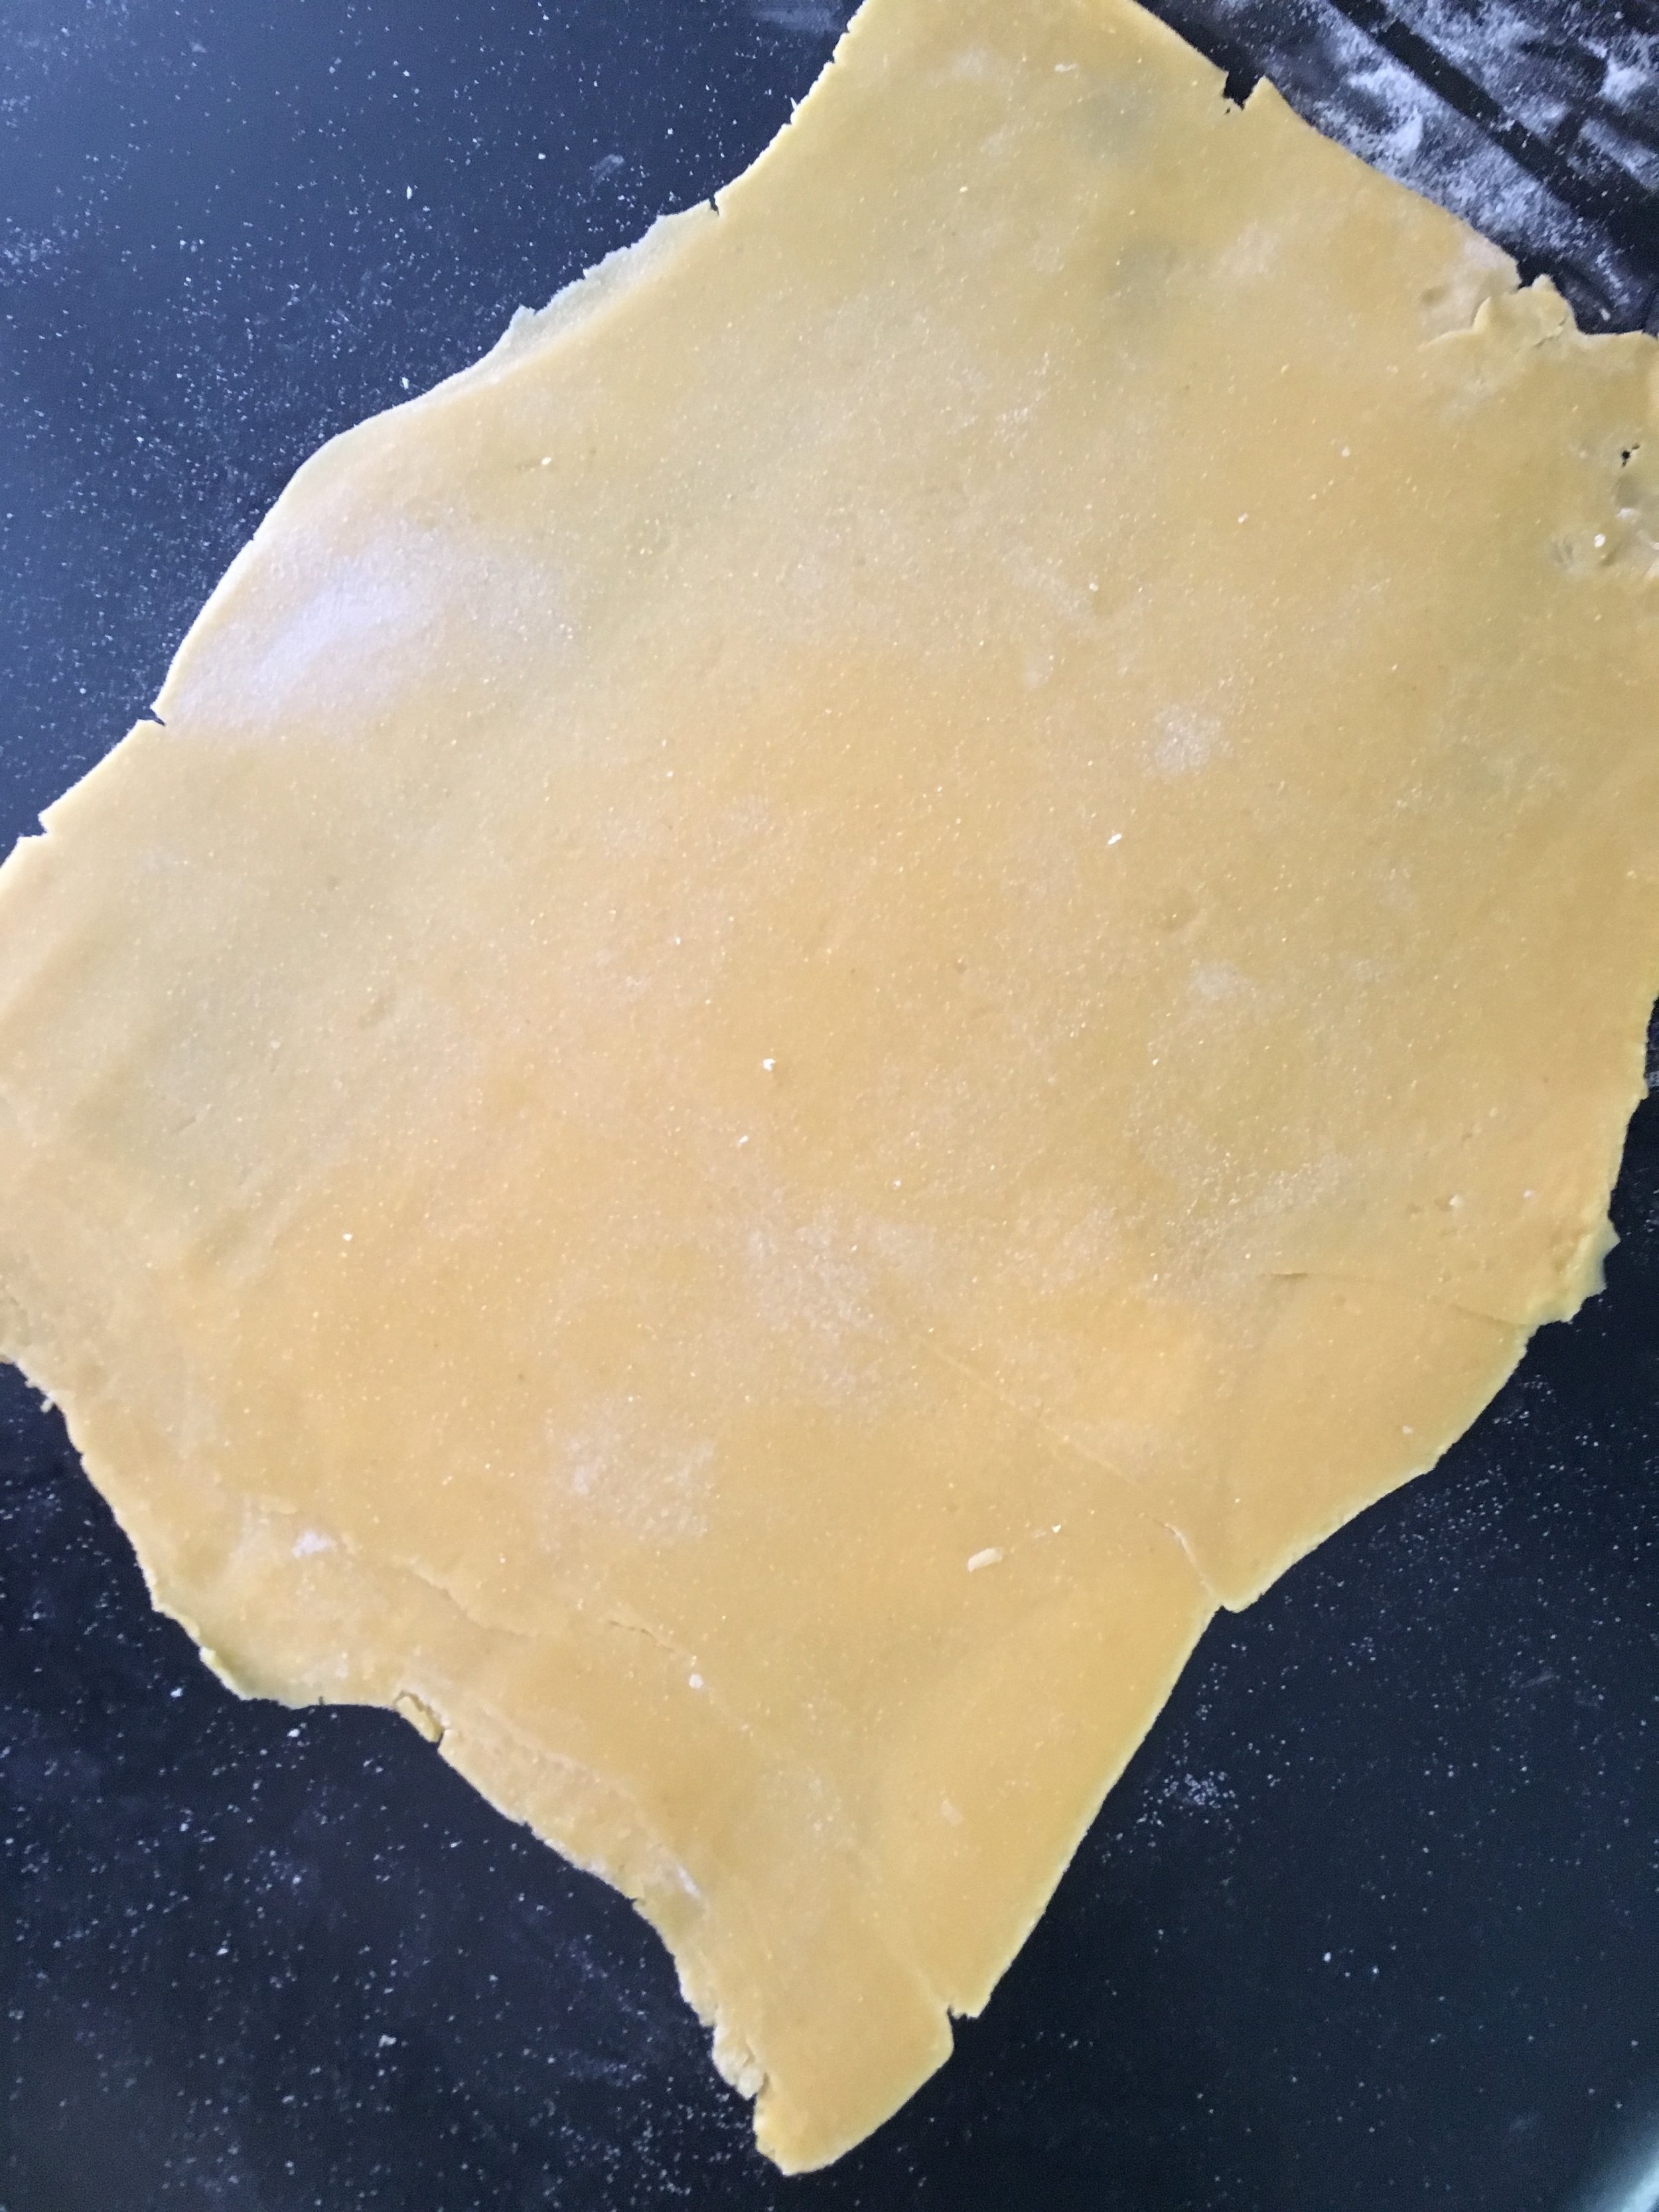
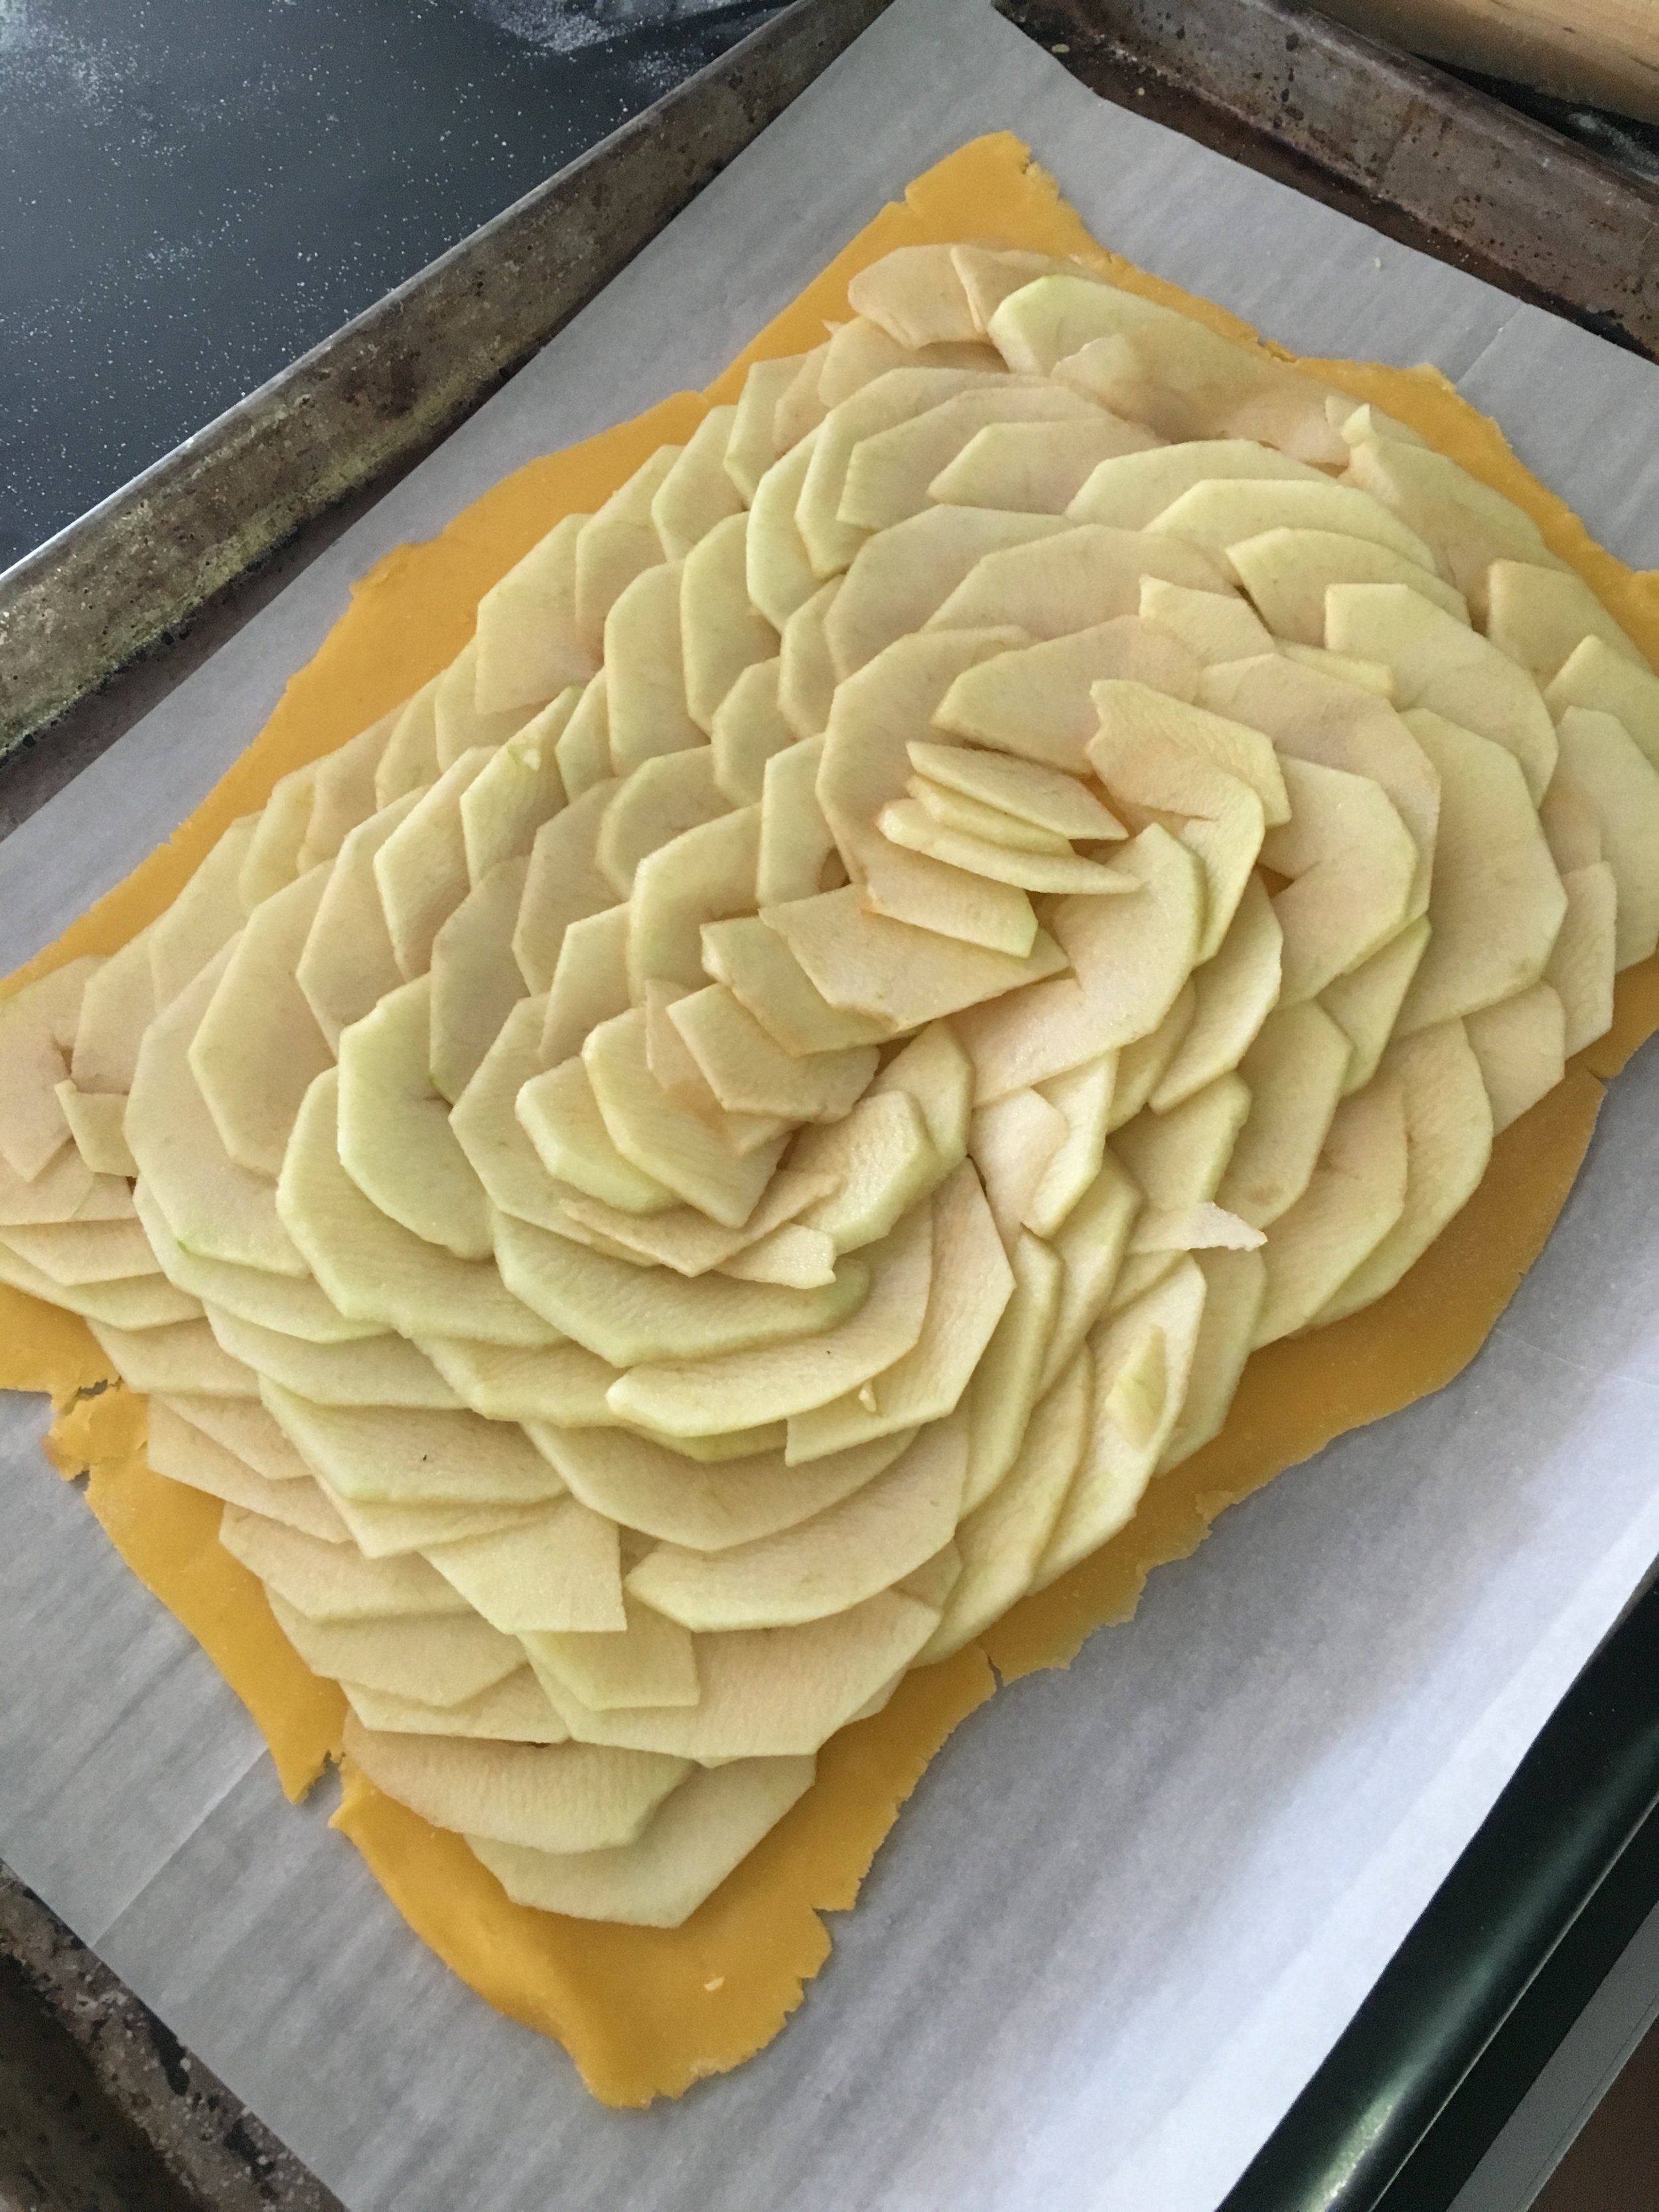
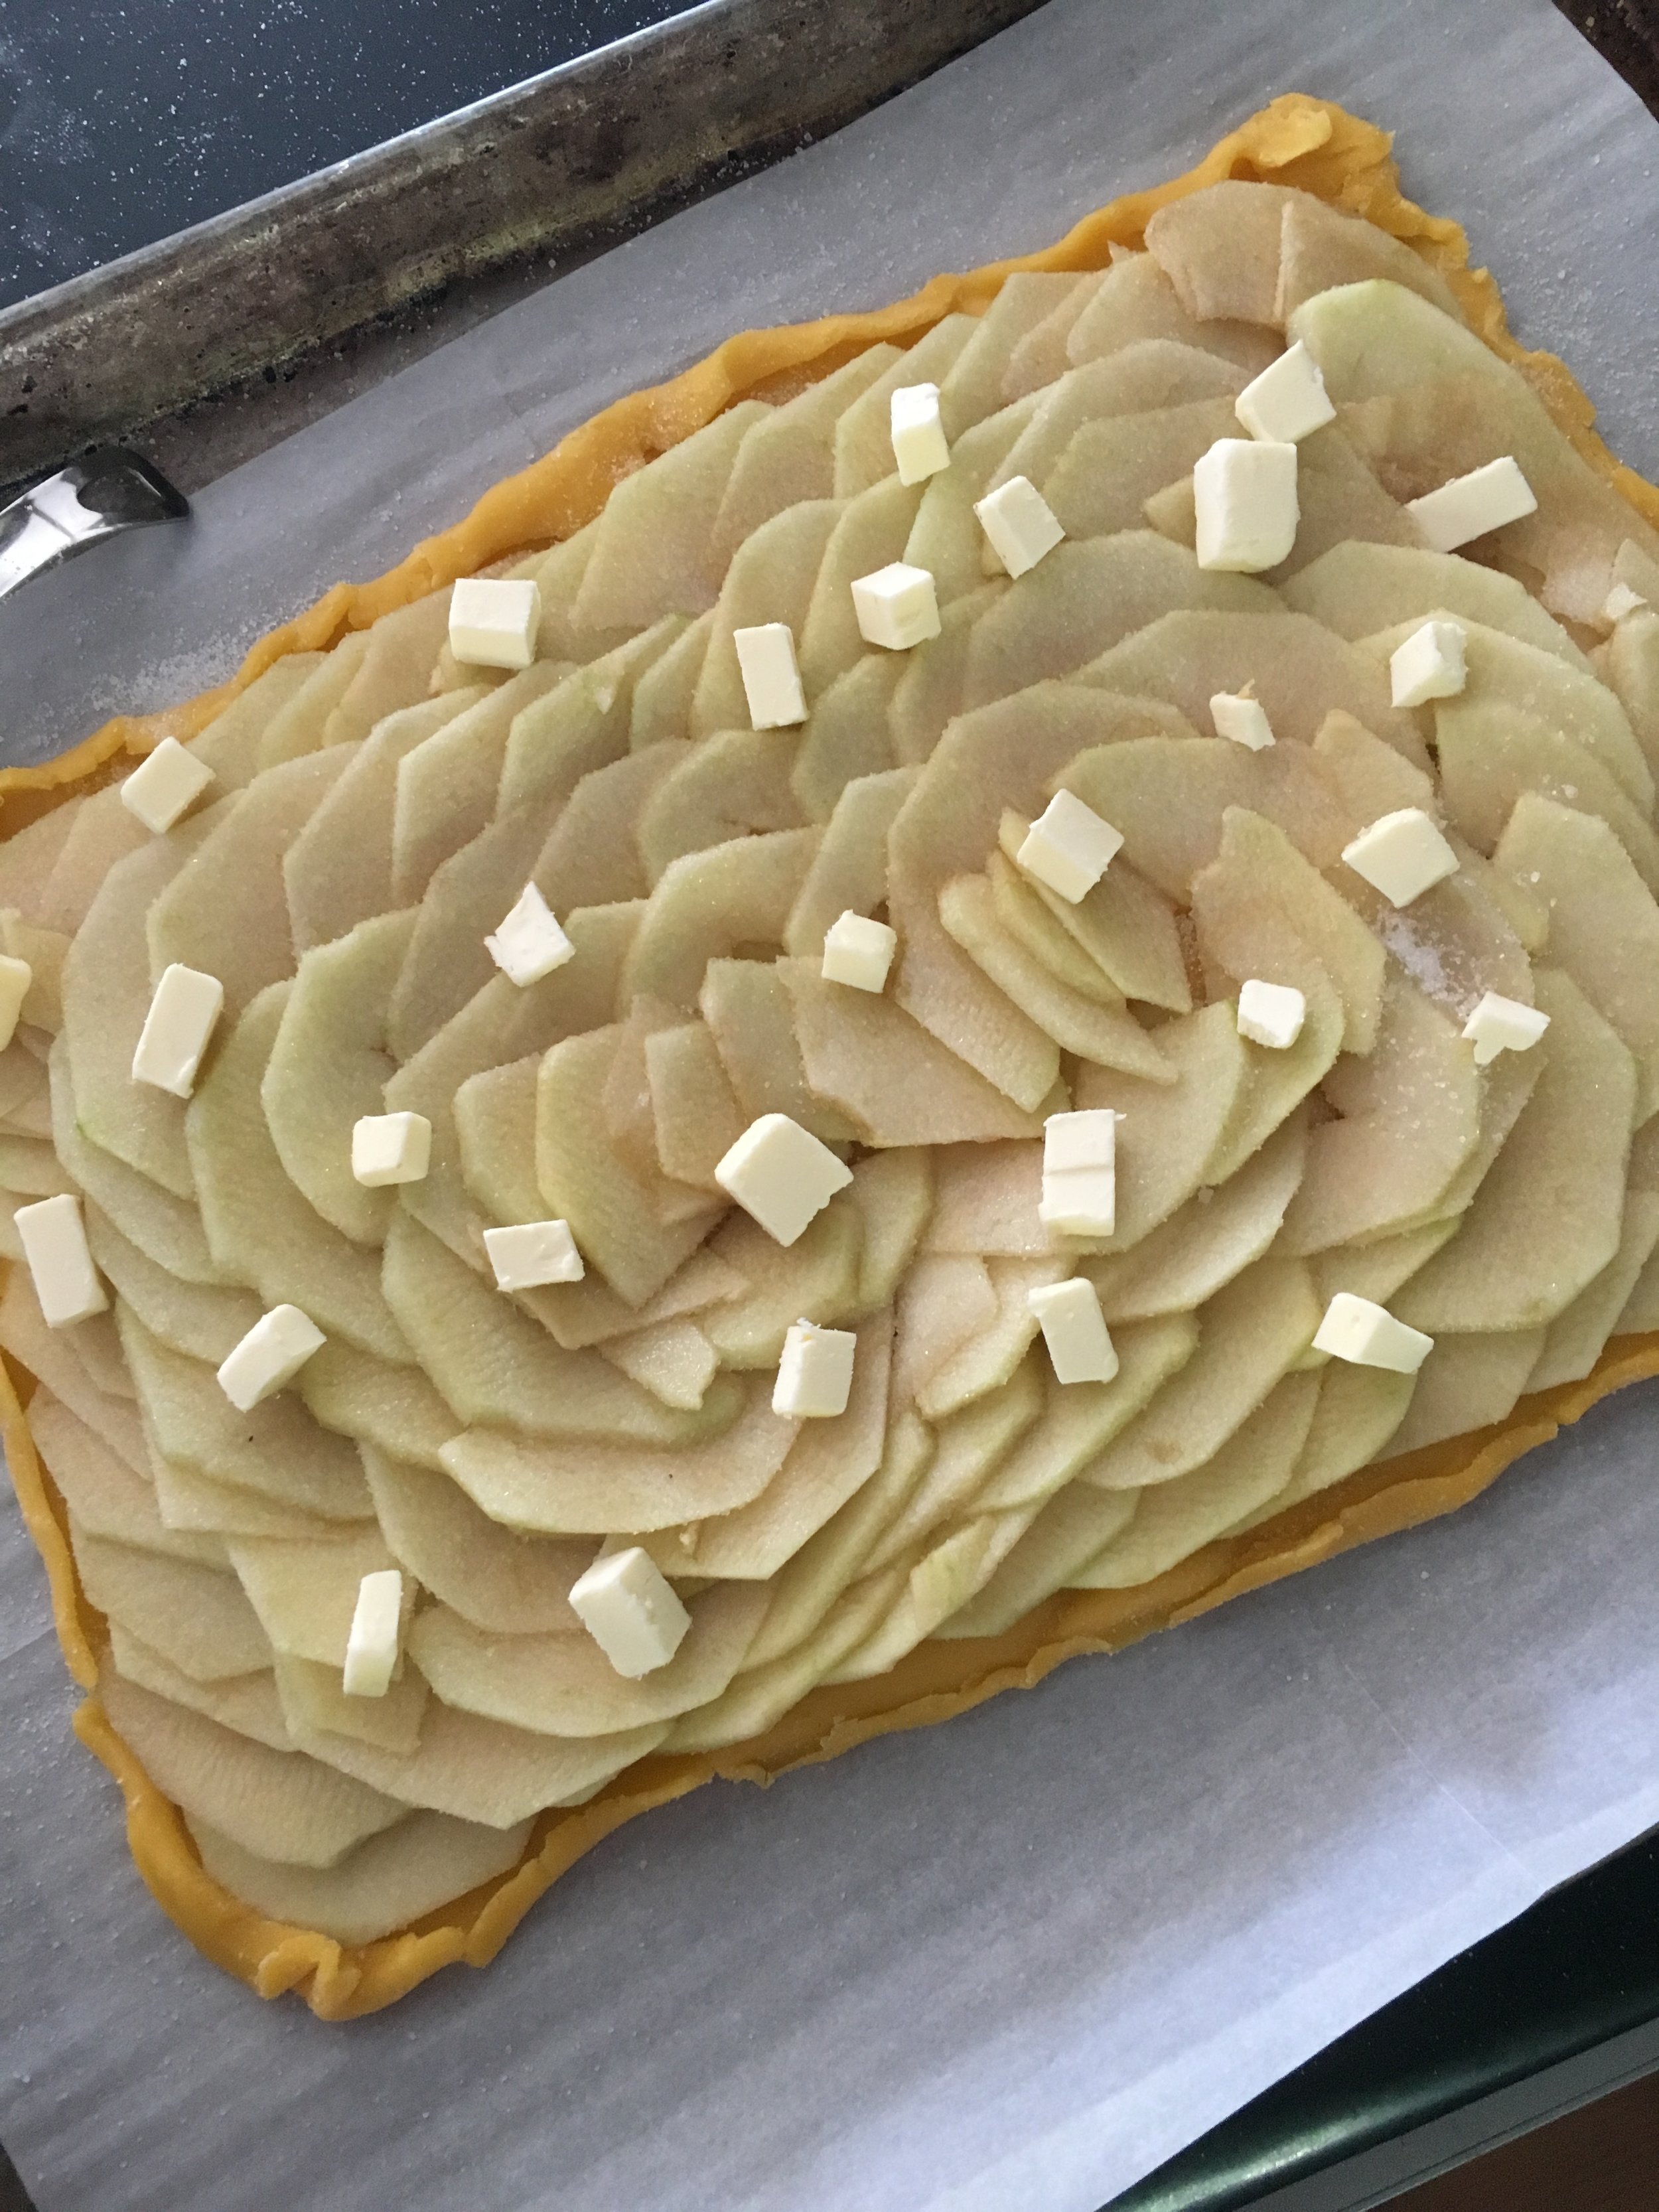
Lightly flour your countertop and roll out your pastry dough to about the size of your baking sheet and carefully move it to the baking sheet. Now, like the artist that you are, begin placing the apple slices in a fan pattern on top of the rolled out dough, starting at the edge of the puff pastry and working your way inward towards the center. Make each slice overlap 3/4s of the previously-placed slice. That sounds more confusing than it is.... take a look at the pictures and it will make more sense. If it still doesn't make sense, just make it look pretty.
Sprinkle the top of the tart with 2 TBSPs of the granulated sugar and 2 TBSPS of the cold unsalted butter cut into 10-12 mini-cubes. Place tart in the oven to bake for 30 minutes or until the crust is golden brown. Check and rotate tart after about 15 minutes.
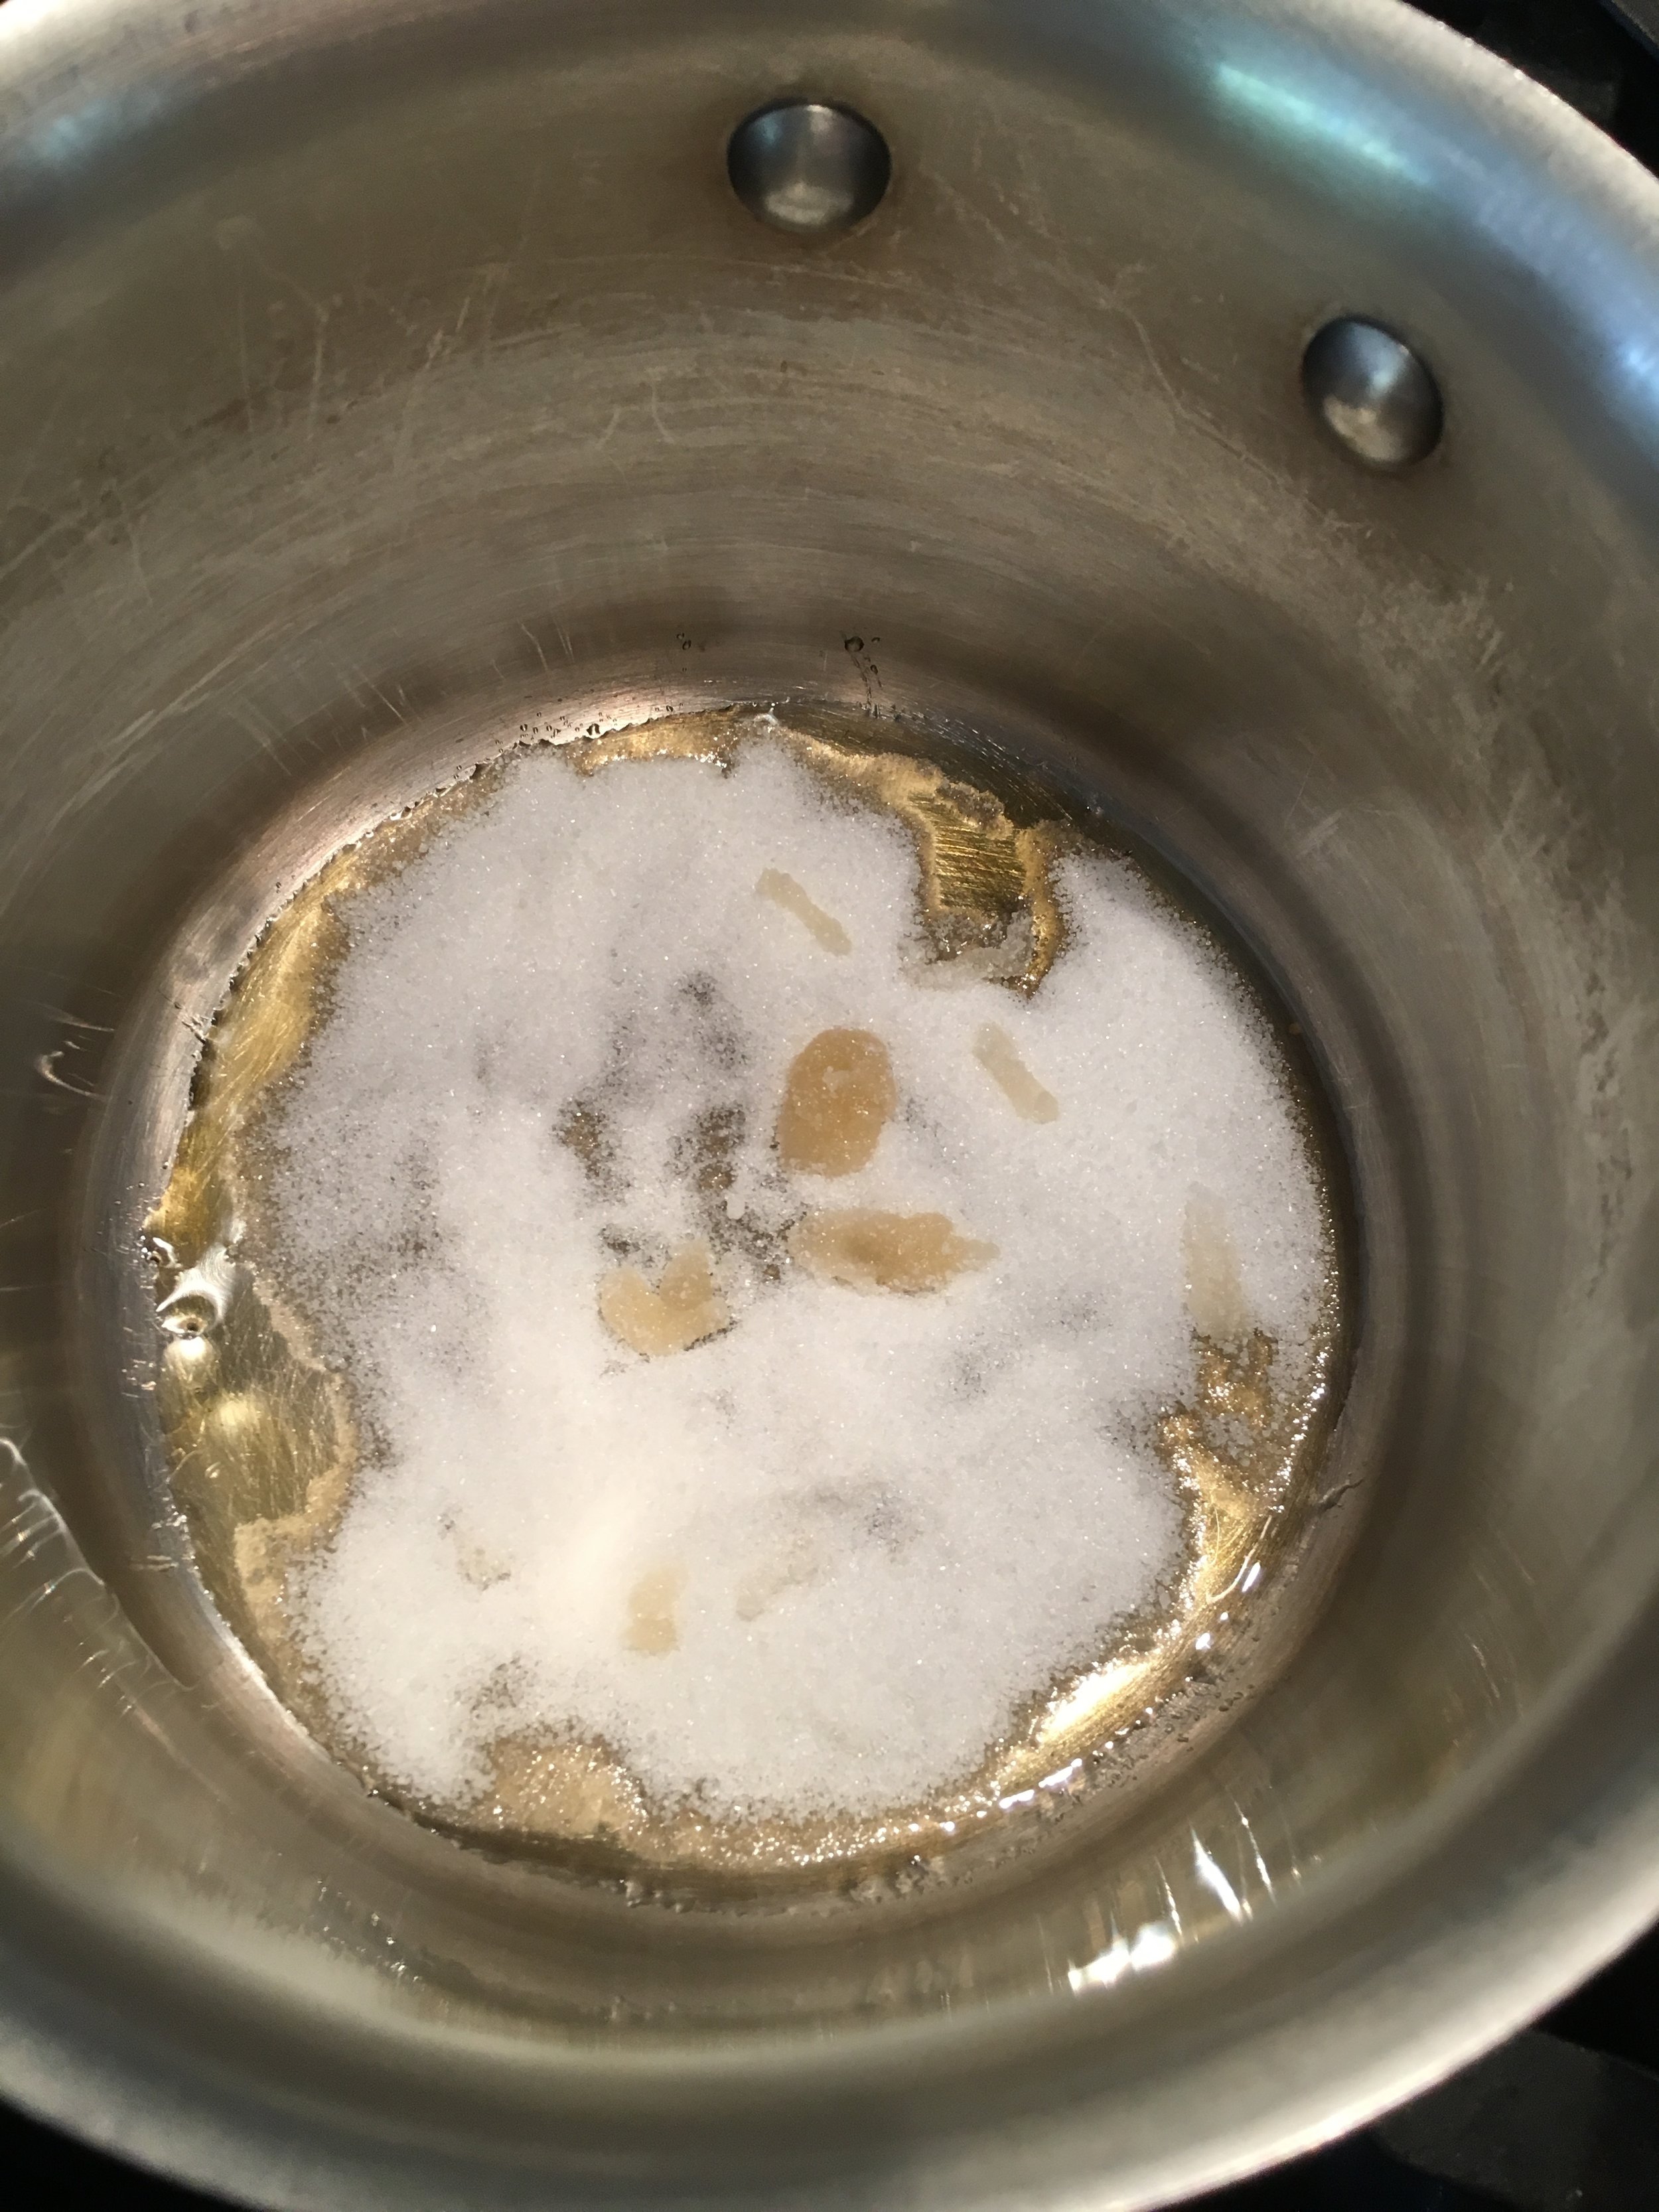
After the tart has been baking for about 15 minutes, it's time to make your salted caramel sauce. Add remaining 1/4 cup granulated sugar to a small pot over medium-high heat. With a rubber spatula in your hand, stand there and watch. Don't walk away. This happens fast. As you notice the sugar begin to melt and turn a light copper color, give the pot a little stir, moving the dry sugar into the pools of melted sugar. Let it all cook a few minutes more until it turns a lovely dark copper. Voila! You're halfway to making caramel!
Off heat, add sea salt, remaining 2 TBSPs unsalted butter, and heavy cream, stirring constantly. The sugar may seize up. Don't worry. Once the butter seems fully melted and incorporated, return the pot to medium heat and stir until the hardened sugar remelts and you have a dreamy creamy looking caramel sauce. Find a pastry brush and set the caramel sauce aside.
When the tart is finished baking, remove it from the oven BUT leave the oven on. Brush the salted caramel sauce across the entire tart-- crust & all. Be sure to brush in the direction of the apples so you don't disrupt your pretty pattern. Once all the sauce has been added (or as much as you think looks like the right amount), return the tart to the oven for another 5-10 minutes or until you notice the caramel sauce bubbling away. Mmmmm... bubbling caramel.
Let tart cool completely before removing from the baking sheet and slicing into squares. Sprinkle a little more sea salt over the entire tart and serve plain, with whipped cream or even vanilla ice cream. Tart will last at least 24 hours, so you can make this one ahead of time. I let mine sit in the fridge overnight and it still tasted pretty indulgently perfect the next day.